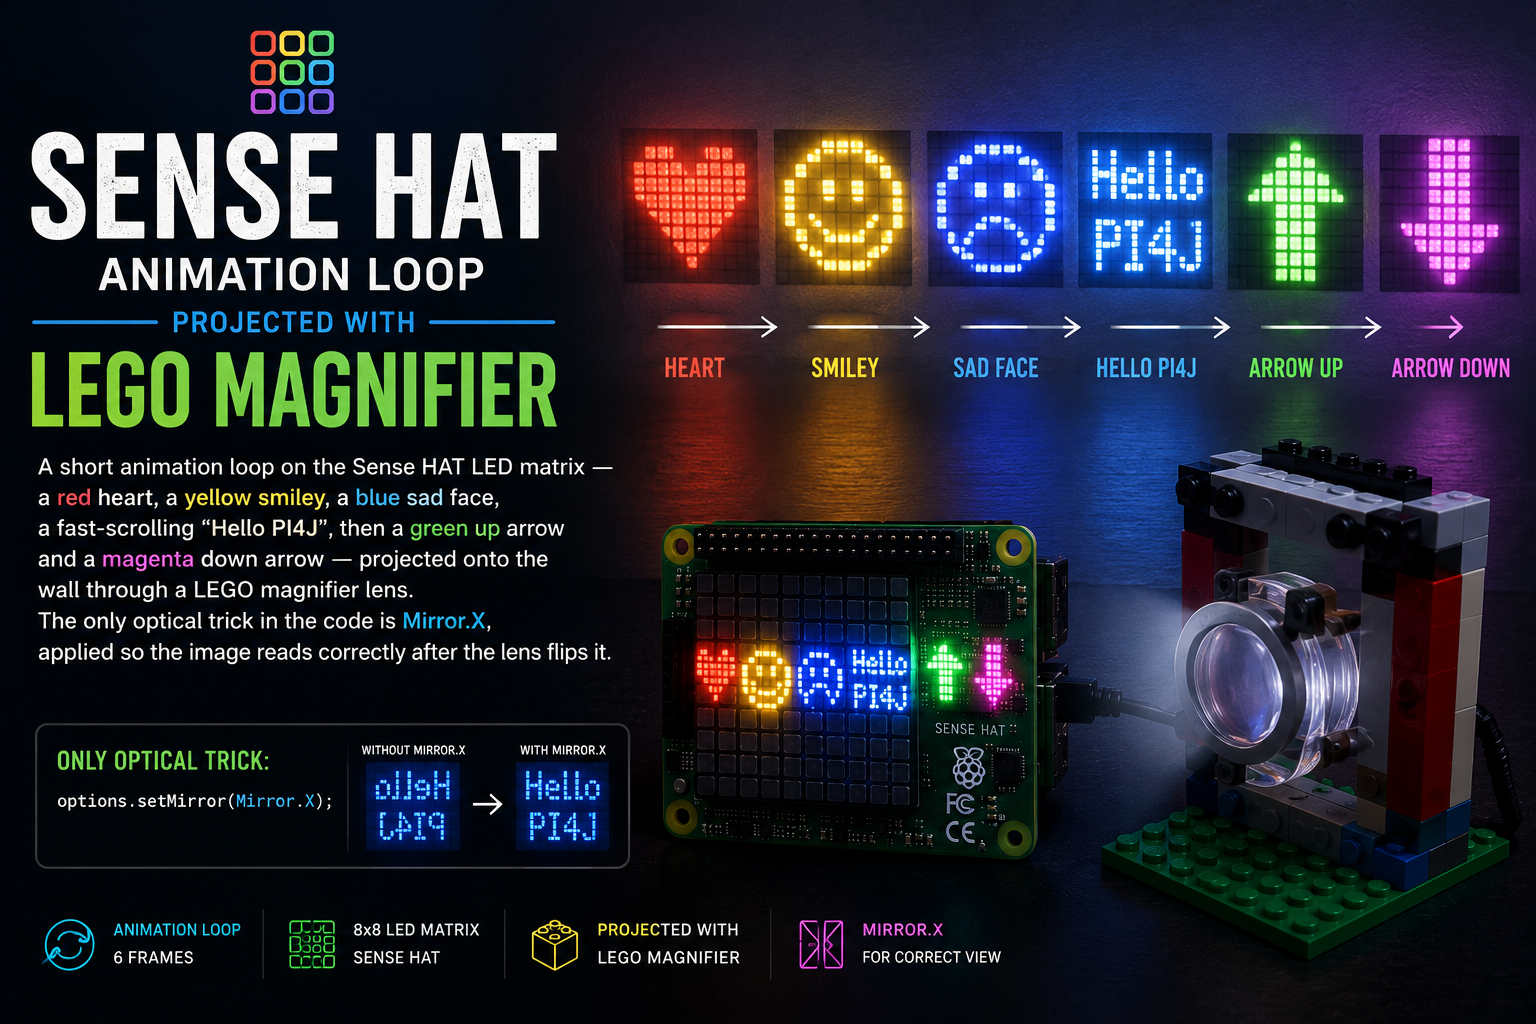
Turning the Sense HAT into a LEGO-lens wall projector
A short animation loop on the Sense HAT LED matrix — a red heart, a yellow smiley, a blue sad face, a fast-scrolling "Hello PI4J", then a green up arrow and a magenta down arrow — projected onto the wall through a LEGO magnifier lens. The only optical trick in the code is Mirror.X, applied so the image reads correctly after the lens flips it.
Projector is an experiment in cheap optics. The Sense HAT is bright enough that if you hold a small convex lens above it at the right distance, the 8×8 matrix comes into focus on a wall a metre or two away — a tiny, upside-down, mirror-flipped image of whatever the LEDs are showing. Point a LEGO magnifier lens at it (the classic transparent piece from the microscope / detective kits), slide it up and down until the focus locks, and you have a working single-pixel-per-block projector.
Source code: projects/Projector/Projector.java
The idea
A convex lens inverts what it projects. If the LED matrix shows a heart pointing up, the wall gets a heart pointing down and mirrored left-to-right. Rotating the Pi fixes the up/down flip, but the horizontal mirror still needs undoing — otherwise text scrolls backwards and every asymmetric icon points the wrong way.
The code fixes exactly this with one operation: Mirror.X. Every frame drawn on the matrix is reversed along the X axis (each row of eight pixels is reversed) before being pushed to the display. The lens then flips it back, and the projection on the wall reads normally.
That's the whole optical stack:
LEDs → (software Mirror.X) → matrix → (LEGO lens flip) → wall (correct orientation)
No calibration, no maths — just one mirrorX(frame) call that swaps columns 0↔7, 1↔6, 2↔5, 3↔4. Move the lens a few centimetres up or down until the image is sharp on the wall and you're done.
The animation loop
The loop cycles through six frames:
| Step | What | Colour | Duration |
|---|---|---|---|
| 1 | Heart | Red | 2 s |
| 2 | Happy face | Yellow | 2 s |
| 3 | Sad face | Blue | 2 s |
| 4 | Scrolling "Hello PI4J" | Cyan | fast (40 ms/step) |
| 5 | Arrow up | Green | 2 s |
| 6 | Arrow down | Magenta | 2 s |
Every emoji uses a different colour so the projection on the wall clearly changes hue with each step. The scrolling text runs fast so it reads as a quick horizontal streak rather than a slow crawl — well matched to the projector-toy vibe.
How the mirroring is implemented
Static frames are just an int[64] with one colour value per pixel. Before sending, each row is reversed:
private static int[] mirrorX(int[] frame) {
    int[] out = new int[64];
    for (int row = 0; row < 8; row++) {
        for (int col = 0; col < 8; col++) {
            out[row * 8 + col] = frame[row * 8 + (7 - col)];
        }
    }
    return out;
}
That is exactly what the driver's GraphicsDisplay.Mirror.X option does under the hood — writing it out in-line here keeps the trick visible in the source. Each frame becomes:
hat.setPixels(mirrorX(frame));
Thread.sleep(FRAME_MS);
The scrolling text uses the driver's built-in showMessage(...) with ScrollDirection.LEFT_TO_RIGHT. The lens flips the direction back to a natural right-to-left read on the wall — the equivalent of Mirror.X applied to motion instead of pixels.
Running it
Same setup as the other examples — this script depends on my igfasouza branch of pi4j-drivers:
git clone -b igfasouza https://github.com/igfasouza/pi4j-drivers.git
cd pi4j-drivers
mvn install
Then, on a Raspberry Pi with a Sense HAT attached:
jbang projects/Projector/Projector.java
Turn the room lights down, hold the LEGO lens 3–6 cm above the matrix, aim at a light-coloured wall, and slide the lens vertically until the image snaps into focus.
Tips for the projection
- Distance. The lens-to-matrix gap sets the focal length; the lens-to-wall distance sets the image size. A magnifier a few centimetres above the matrix, with the wall a metre or two away, gives a projection roughly the size of a coffee mug.
- Room light. LEDs are bright but tiny — the darker the room, the sharper the projection.
- Wall colour. A matte white wall is ideal; anything glossy scatters the image.
- Lens quality. The LEGO magnifier is not exactly Zeiss glass — expect chromatic fringing at the edges, especially on the red heart. It's part of the charm.
Tweaks worth trying
- Timing. Bump
FRAME_MSup for a slow-changing status display, or down to 500 ms for a strobe-style loop. DropSCROLL_MSto 25 for a truly frantic scroll. - Own frames. Any 64-entry
int[]can be added to the loop — draw your own emoji in a grid, feed it toshowFrame(...)and it'll get mirrored and projected like the rest. - Longer message. Replace
"Hello PI4J"with the sensor readings from the HAT — temperature, pressure — and you have a live projected dashboard on the wall. - Video mode. Instead of static frames, feed a low-resolution animation (say 8×8 GIF frames converted to
int[]) and play them back at 10–15 FPS.
For a related example that also relies on setPixels for whole-frame updates, see the Emoji Loop demo — same drawing model, no lens required.