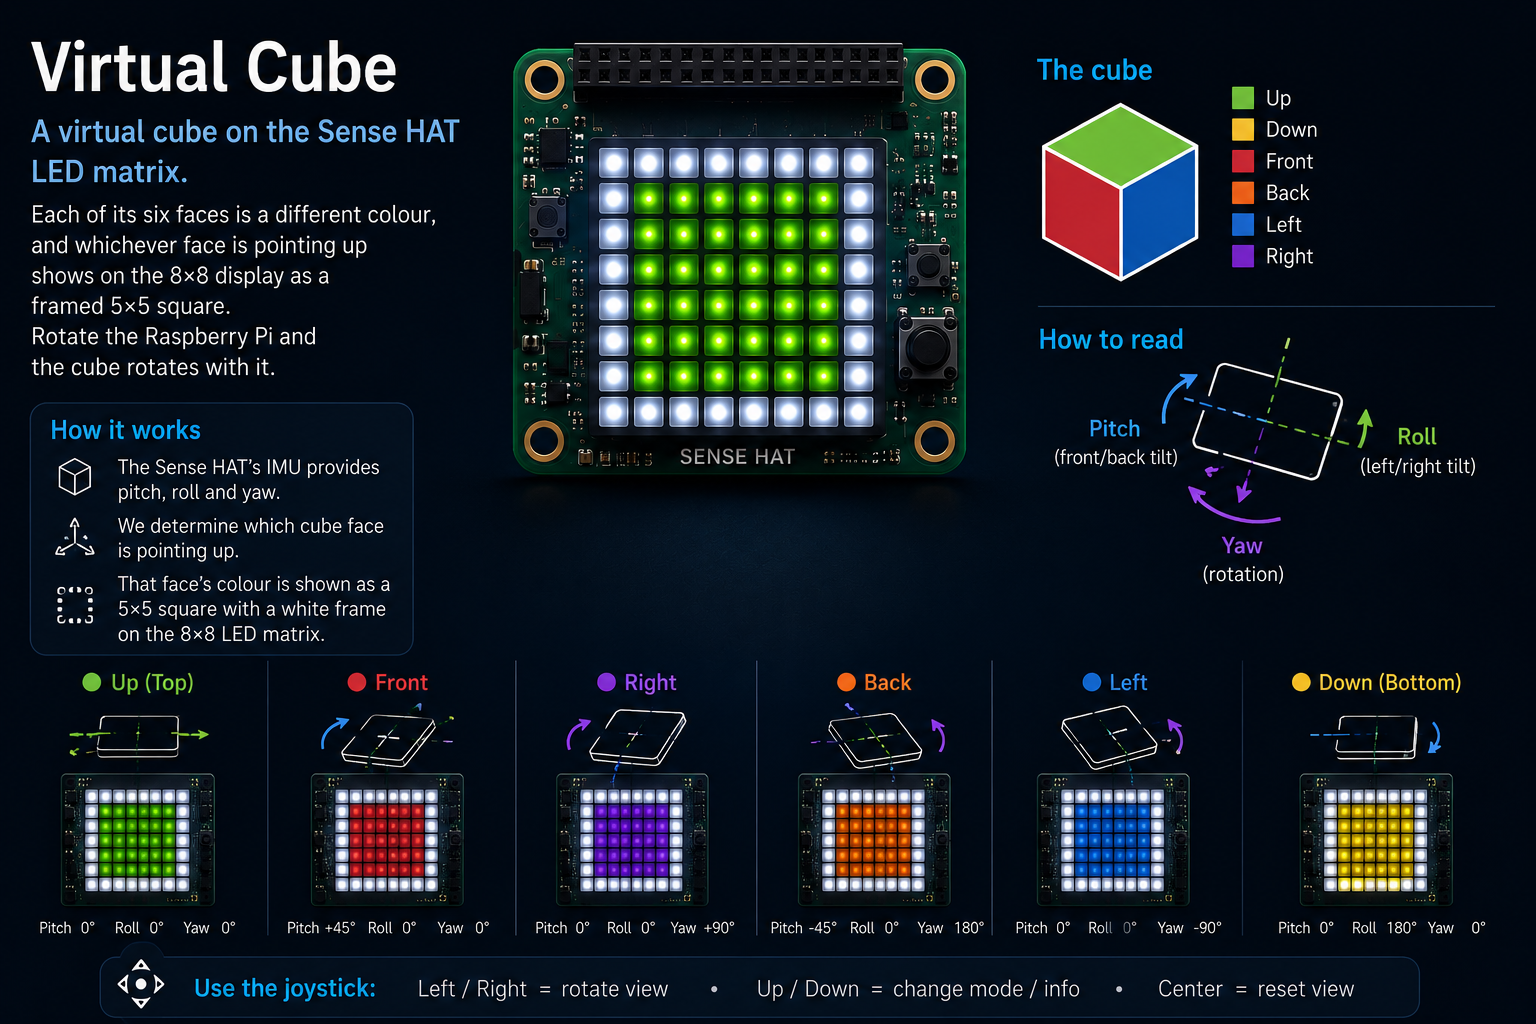
A rotating six-colour cube on the Sense HAT
A virtual cube on the Sense HAT LED matrix. Each of its six faces is a different colour, and whichever face is pointing up shows on the 8×8 display as a framed 5×5 square. Rotate the Raspberry Pi and the cube rotates with it.
Cube turns the Sense HAT into a six-sided coloured die — not the pip-and-shake dice from the Dice demo, but a virtual cube where each face is a solid colour. Whichever face is currently pointing up (relative to gravity) is drawn on the 8×8 LED matrix as a framed 5×5 square in that face's colour. Tilt the Raspberry Pi and the cube "rotates" in your hand — the visible face swaps to the one that's now on top.
Source code: projects/Cube/Cube.java
The idea
Take a cube. Paint each of its six sides a different colour:
| Axis | Direction | Colour |
|---|---|---|
| X | +X (right) | Red |
| X | −X (left) | Green |
| Y | +Y (up) | Blue |
| Y | −Y (down) | Yellow |
| Z | +Z (front) | Magenta |
| Z | −Z (back) | Cyan |
Now hold the cube in your hand. Whichever face is on top depends on how you rotate it. That's exactly the mapping this demo builds — but instead of a physical cube, the "cube" is the Raspberry Pi itself, and the "face on top" is read from the Sense HAT's accelerometer.
The result on the LED matrix is a 5×5 tile in the current face colour, framed by a thin dark border so the shape is clearly readable against the black surround. Roll the Pi and the tile snaps to the next colour.
How it works
At rest, gravity pulls the accelerometer reading toward the direction of "down". The axis with the largest absolute value is the one aligned with gravity, and its sign tells you which of the two faces on that axis is currently pointing up.
Every 60 ms the loop:
- Reads
hat.getAccelerometerRaw()→[x, y, z]in m/s². - Finds the dominant axis by comparing
|x|,|y|,|z|. - Uses the sign of that axis to pick one of six faces from a colour table.
- Draws the 5×5 face colour, centred on the 8×8 matrix, with a dark 1-pixel border for definition.
- Pushes the whole 64-pixel frame with a single
setPixels(...)call.
That's the entire program. No smoothing, no thresholds — just "which axis has the strongest gravity component, and is it positive or negative?".
The face-selection logic
The core routine is one comparison ladder:
private static int dominantFace(double x, double y, double z) {
    double ax = Math.abs(x), ay = Math.abs(y), az = Math.abs(z);
    if (ax >= ay && ax >= az) return x >= 0 ? 0 : 1;
    if (ay >= ax && ay >= az) return y >= 0 ? 2 : 3;
    return z >= 0 ? 4 : 5;
}
The returned index looks up a colour in the FACES table. Because the ties are broken deterministically, holding the Pi at exactly 45° between two faces produces a stable choice (rather than flickering) — the colour only changes once gravity has clearly moved to a different axis.
Drawing the face
A 5×5 square inside an 8×8 grid leaves a natural 1- or 2-pixel margin on every side. The demo centres it (start = 1, end = 6) and paints the outer ring of that 5×5 area in a very dark grey to suggest the cube's edge:
. . . . . . . .
. # # # # # . .
. # C C C # . .
. # C C C # . .
. # C C C # . .
. # # # # # . .
. . . . . . . .
. . . . . . . .
Where C is the face colour and # is the edge. The whole 8×8 array is rewritten every frame, so there's no need to clear between updates.
Running it
Same setup as the other examples — the script depends on my igfasouza branch of pi4j-drivers:
git clone -b igfasouza https://github.com/igfasouza/pi4j-drivers.git
cd pi4j-drivers
mvn install
Then, on a Raspberry Pi with a Sense HAT attached:
jbang projects/Cube/Cube.java
Hold the Pi flat, then tip it forward, backward, to each side, and finally flip it upside down. Six colours, six faces.
Tweaks worth trying
- Face palette. Swap the six colours for the classic Rubik's cube set (white, yellow, red, orange, blue, green) and you have a static-cube visualiser.
- Face size. Bump
FACE_SIZEfrom 5 to 7 to fill more of the matrix, or drop to 3 for a smaller, more "distant" cube on a black background. - Orientation-based tilt. Use
hat.getOrientationDegrees()instead of the raw accelerometer and draw a subtly tilted rectangle whose edges shift with roll — a step toward a real 3D projection. - Roll animation. When the dominant axis changes, animate a quick wipe (a few frames of the old colour sliding off, the new one sliding in) to sell the "rotation" feel.
- Debounce. Add a small hysteresis so a face only swaps once the new axis has been dominant for, say, 150 ms — useful if you plan to shake the Pi hard.
For related IMU demos, see the Accelerometer tilt pixel and the Artificial Horizon attitude indicator.